The first thing we need to do is npm install a couple third-party dependencies to use in our Hooks; We’ll need Browserify and babelify. After we have these dependencies added we can easily write a hook that will run browserify on our ES Modules with the added bonus of being able to easily require other JS dependencies from npm.
Setting up the code to Hook into
I prefer using npm scripts and triggering those via Hooks, this allows npm to handle the paths and we don’t have to references things like ./node_modules/.bin/browserify to use browserify on the CLI. So, our first step will be writing an npm script in our package.json file.
It should look similar to the following:
1 | |
Here we’re
- executing
browserifyand passingjs/main.jsas the entry file. - passing a
-tbabel transform, so that babel will transform our code into ES 5, and modules to CommonJS style. - passing presets to babel
- then passing the bundled code to stdout which is piped into
js/bundle.js
You could also include uglifyjs and pipe browserifies content to it, but since we can trigger that via CodeKit I see no reason to add that extra dependency since it’s provided. But there may be some case where you might want this, so it’s completely possible to handle minification here as well.
Run down of file and directory content
1 | |
The above are just simple files to demonstrate small modules that can be imported and bundled up, we do however have rxjs that was installed via npm. I’ve included this to show the ease of including thrid-party libs using this work flow.
1 | |
1 | |
1 | |
1 | |
In main.js we can see that we’re requiring our own ES Modules with a relative path ./. This is important so that browserify knowns that the file is relative to the file it’s being imported within and not a dependency that’s within node_modules.
As for Observable we’re importing it with no relative path, doing this browserify will do a lookup in your node_modules folder to find the dependencies needed. You also may notice that we’re using the new ES Module syntax to import the Observable, even though it’s built via the CommonJS pattern. This is possible because Babel’s presets will use the CommonJS style when transforming your code, which is nice since we can code in the standard syntax while still requiring dependencies that are built using the CommonJS format.
Another added benefit is that import {Observable} from 'rxjs/Observable' is converted to var Observable = require('rxjs/Observable').Observable. Note the added .Observable needed using the CommonJS style; It’s a nice benefit of not having to do this with the ES Module syntax.
CodeKit project setup
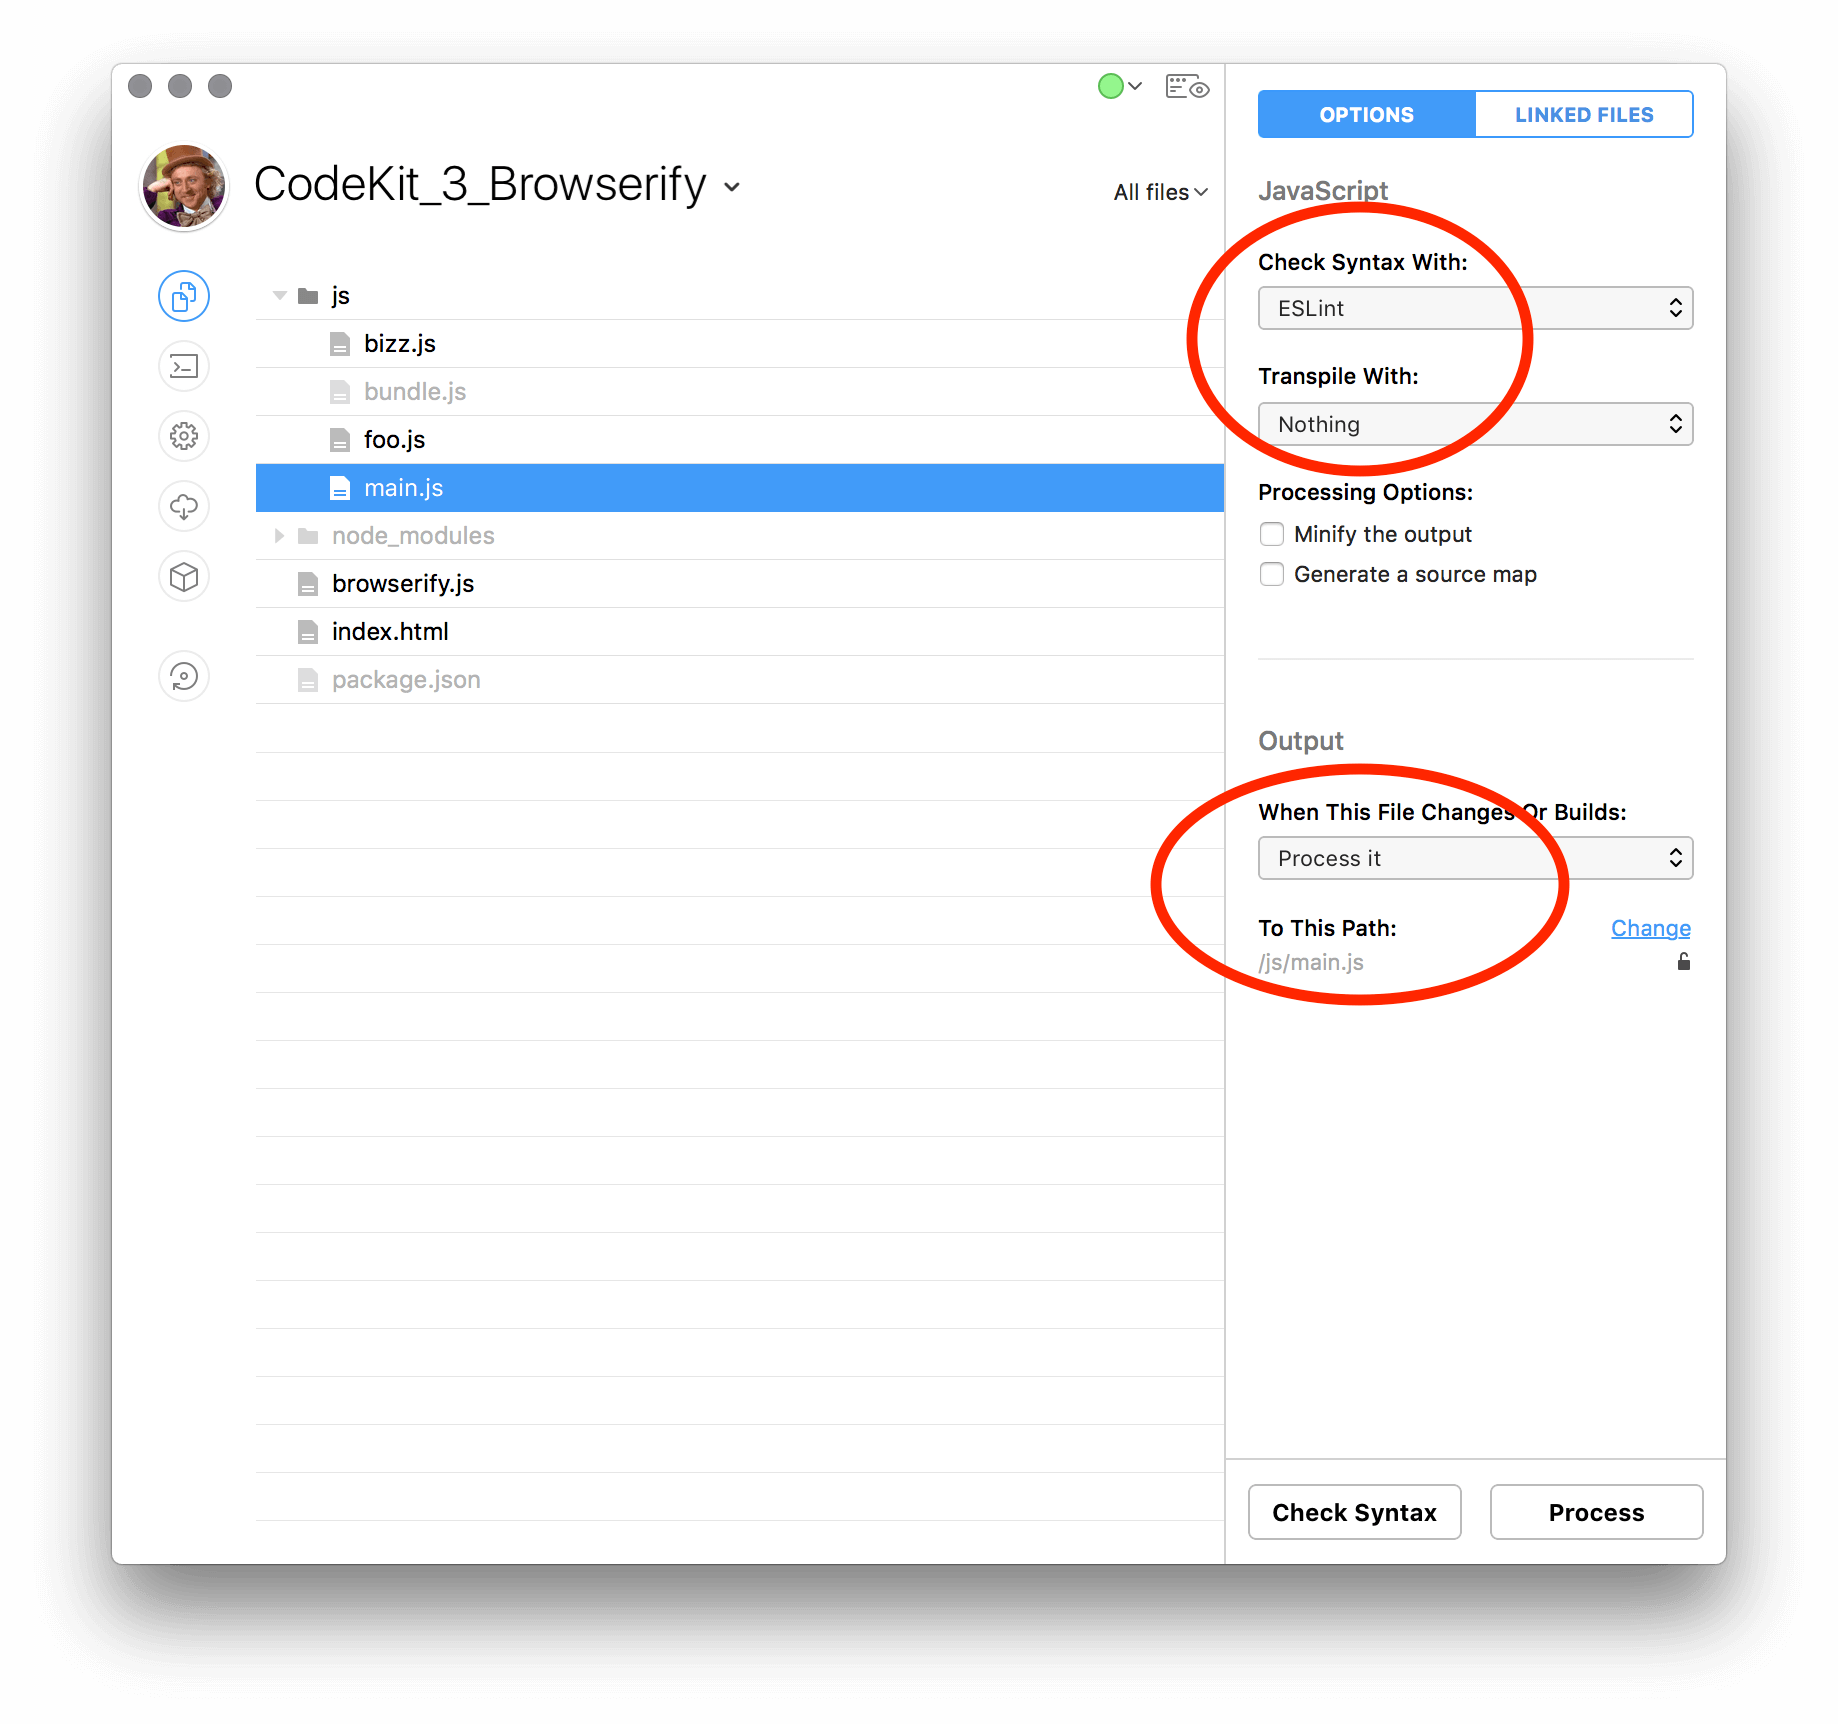
JS Files
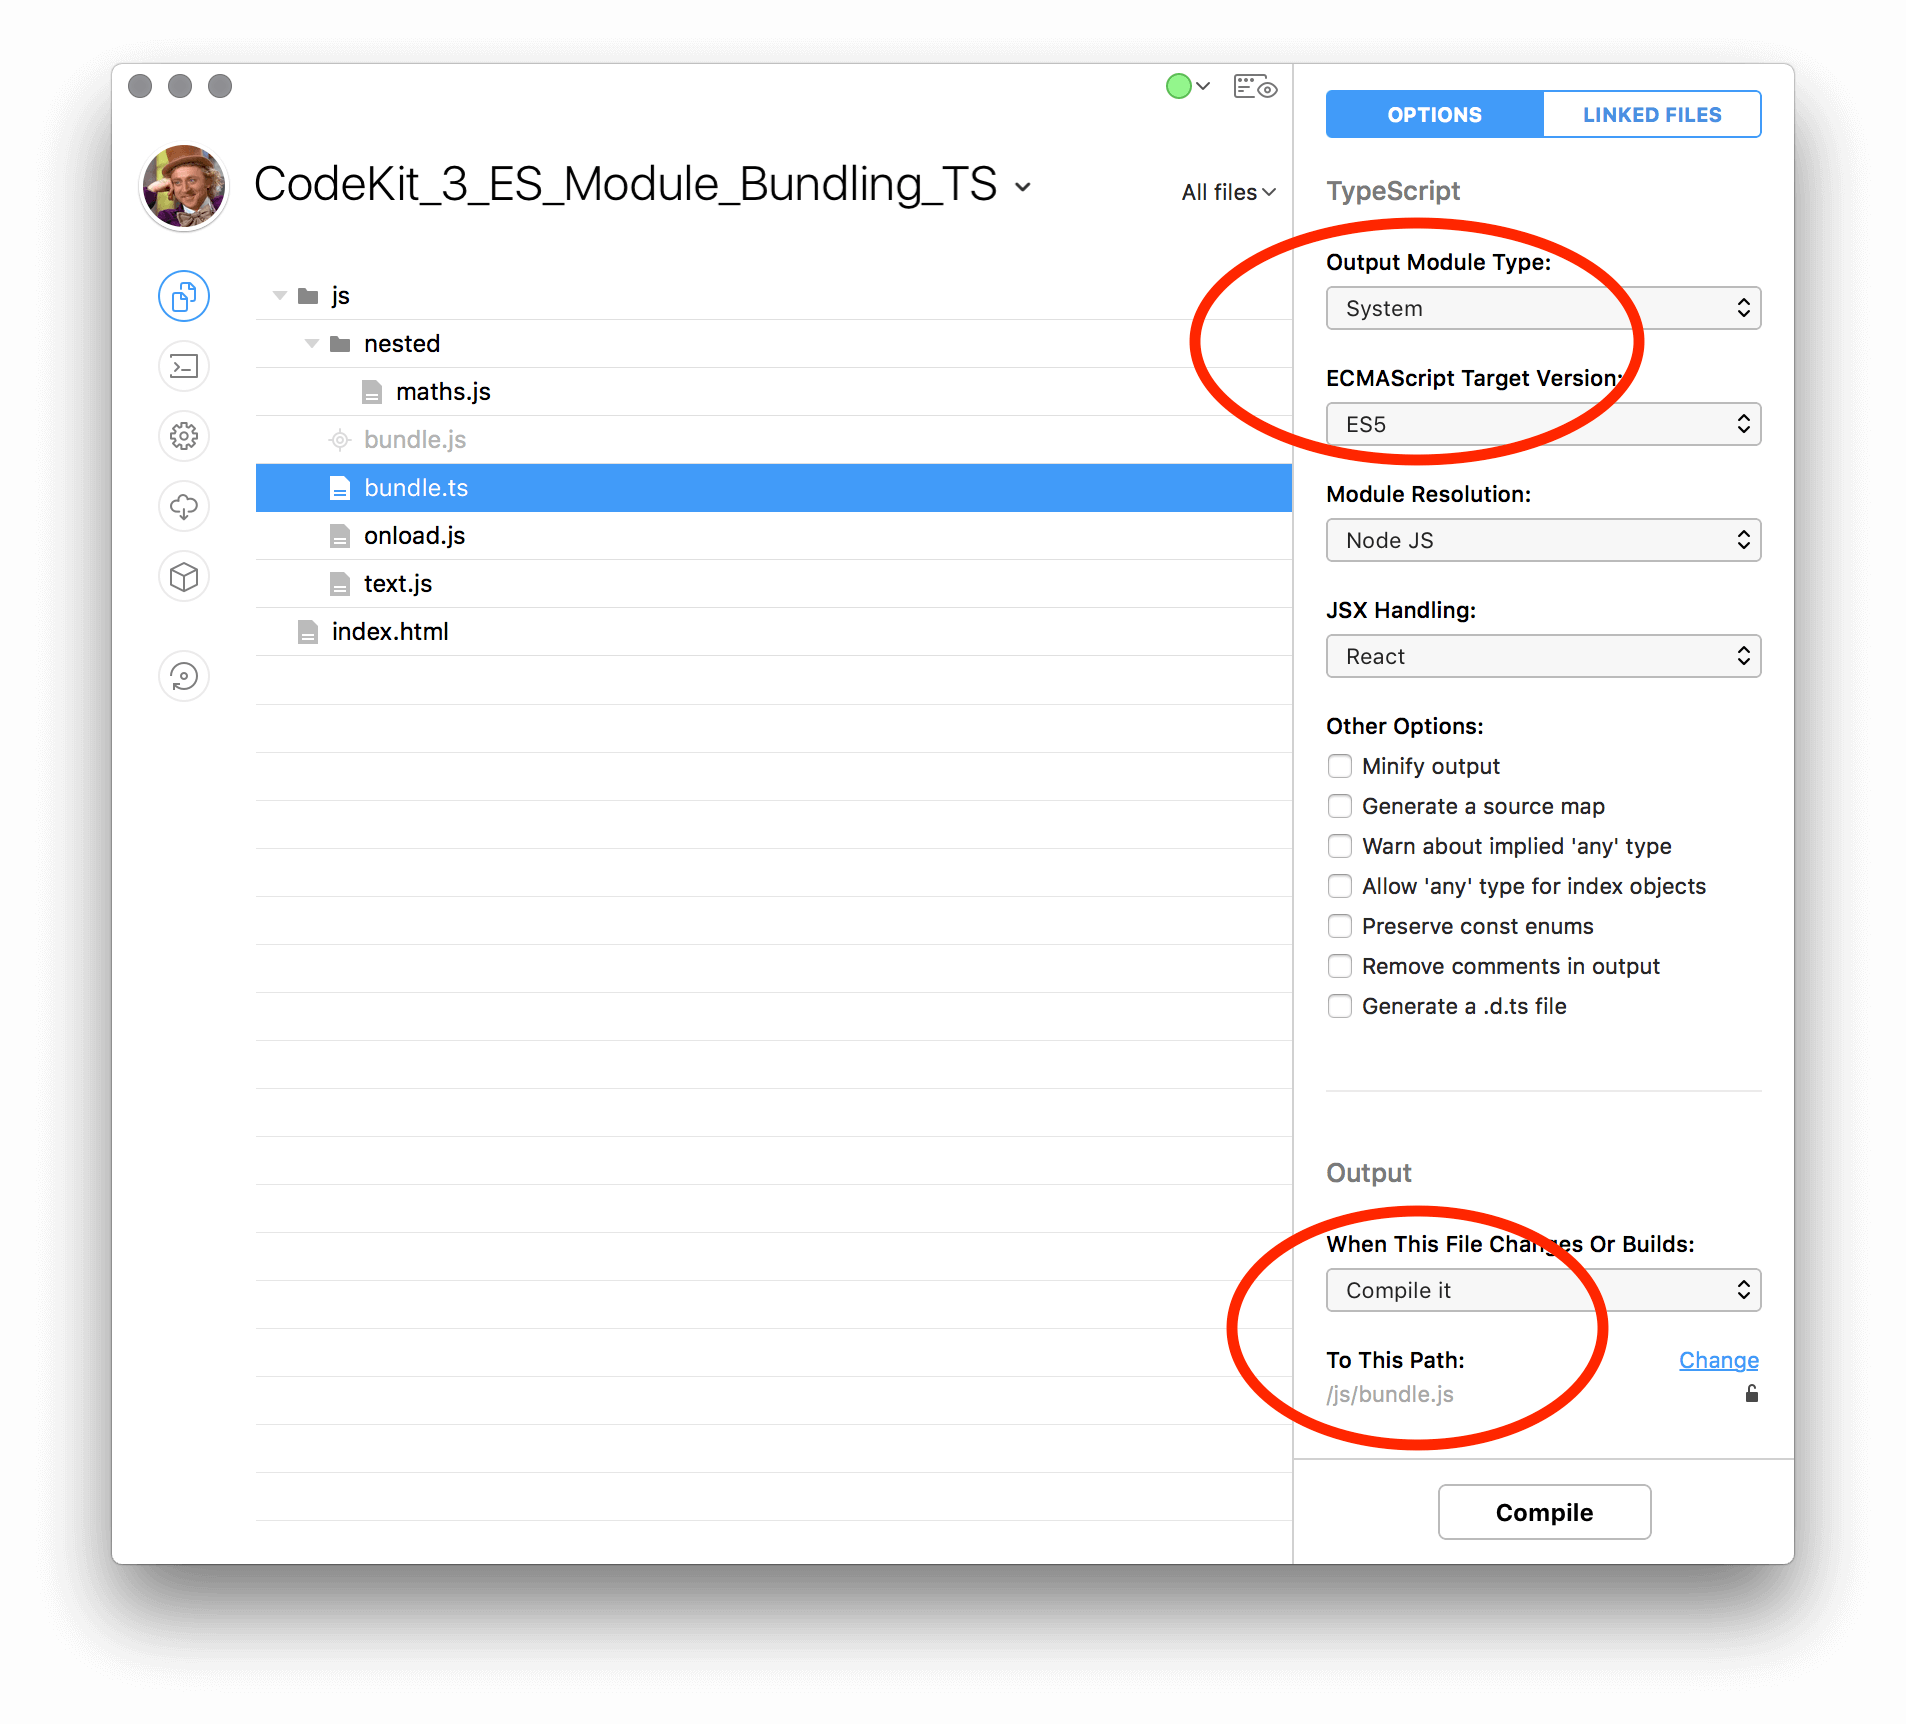
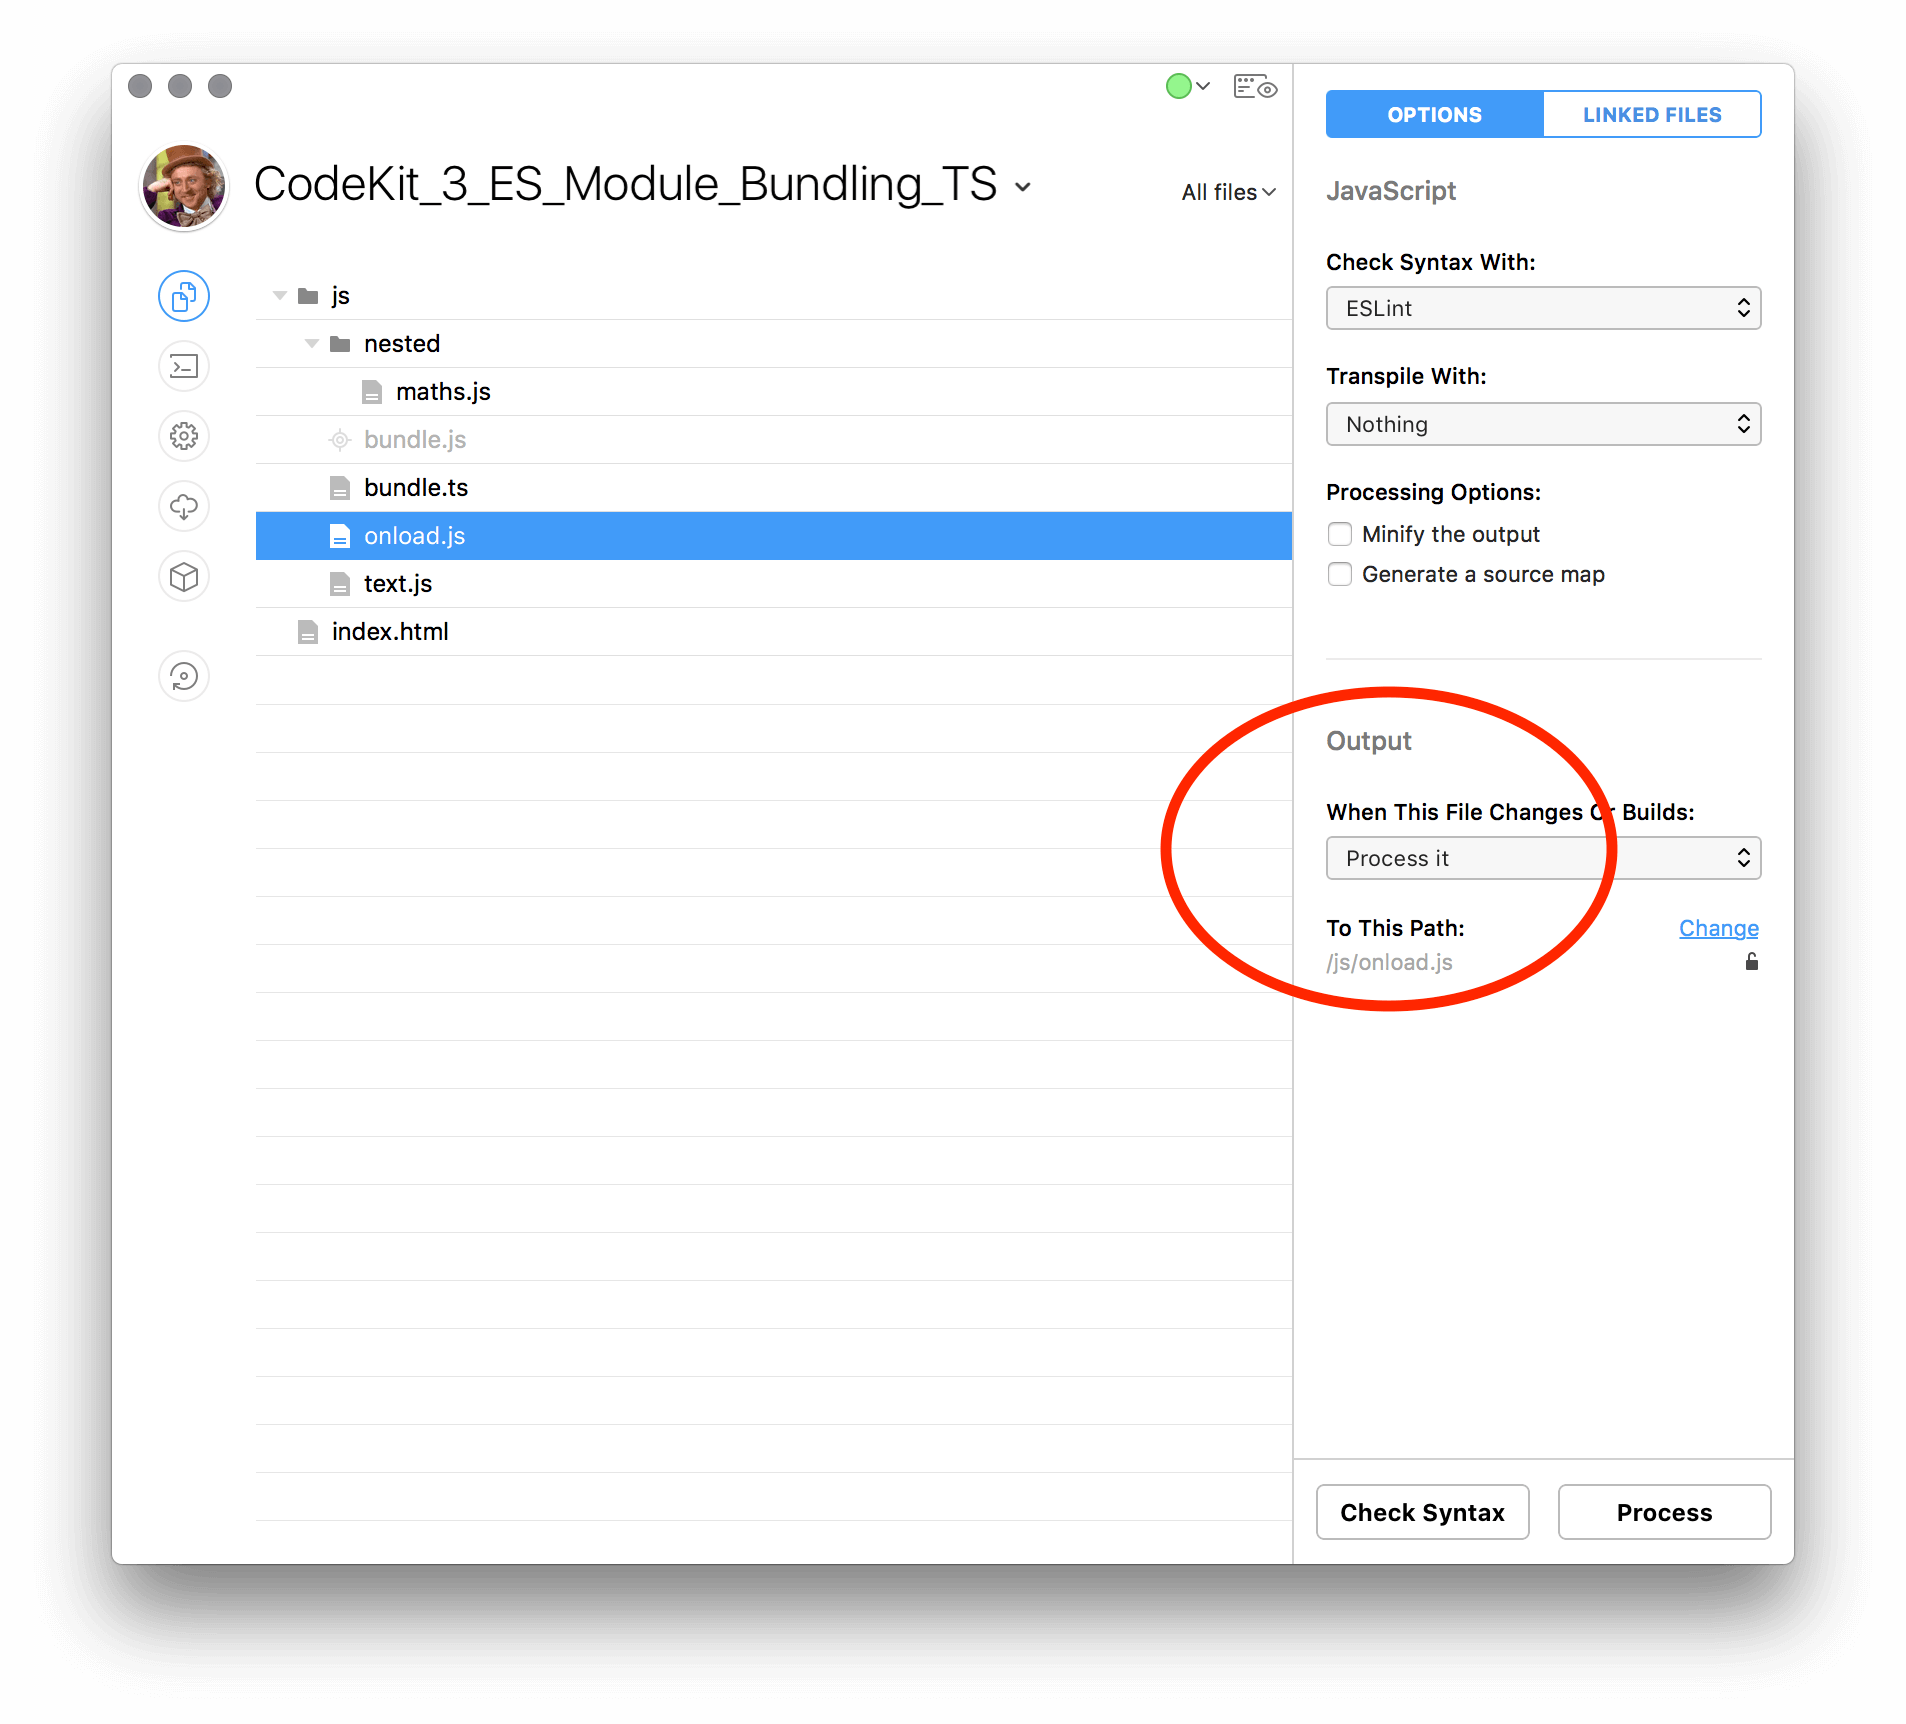
You’ll want to setup each js file to be processed, but, ensure that you set Transpile With: to Nothing; This is because we’re going to be processing this file to itself. You can, however, setup up the linter of your choice, I’ve been moving over the ESLint.
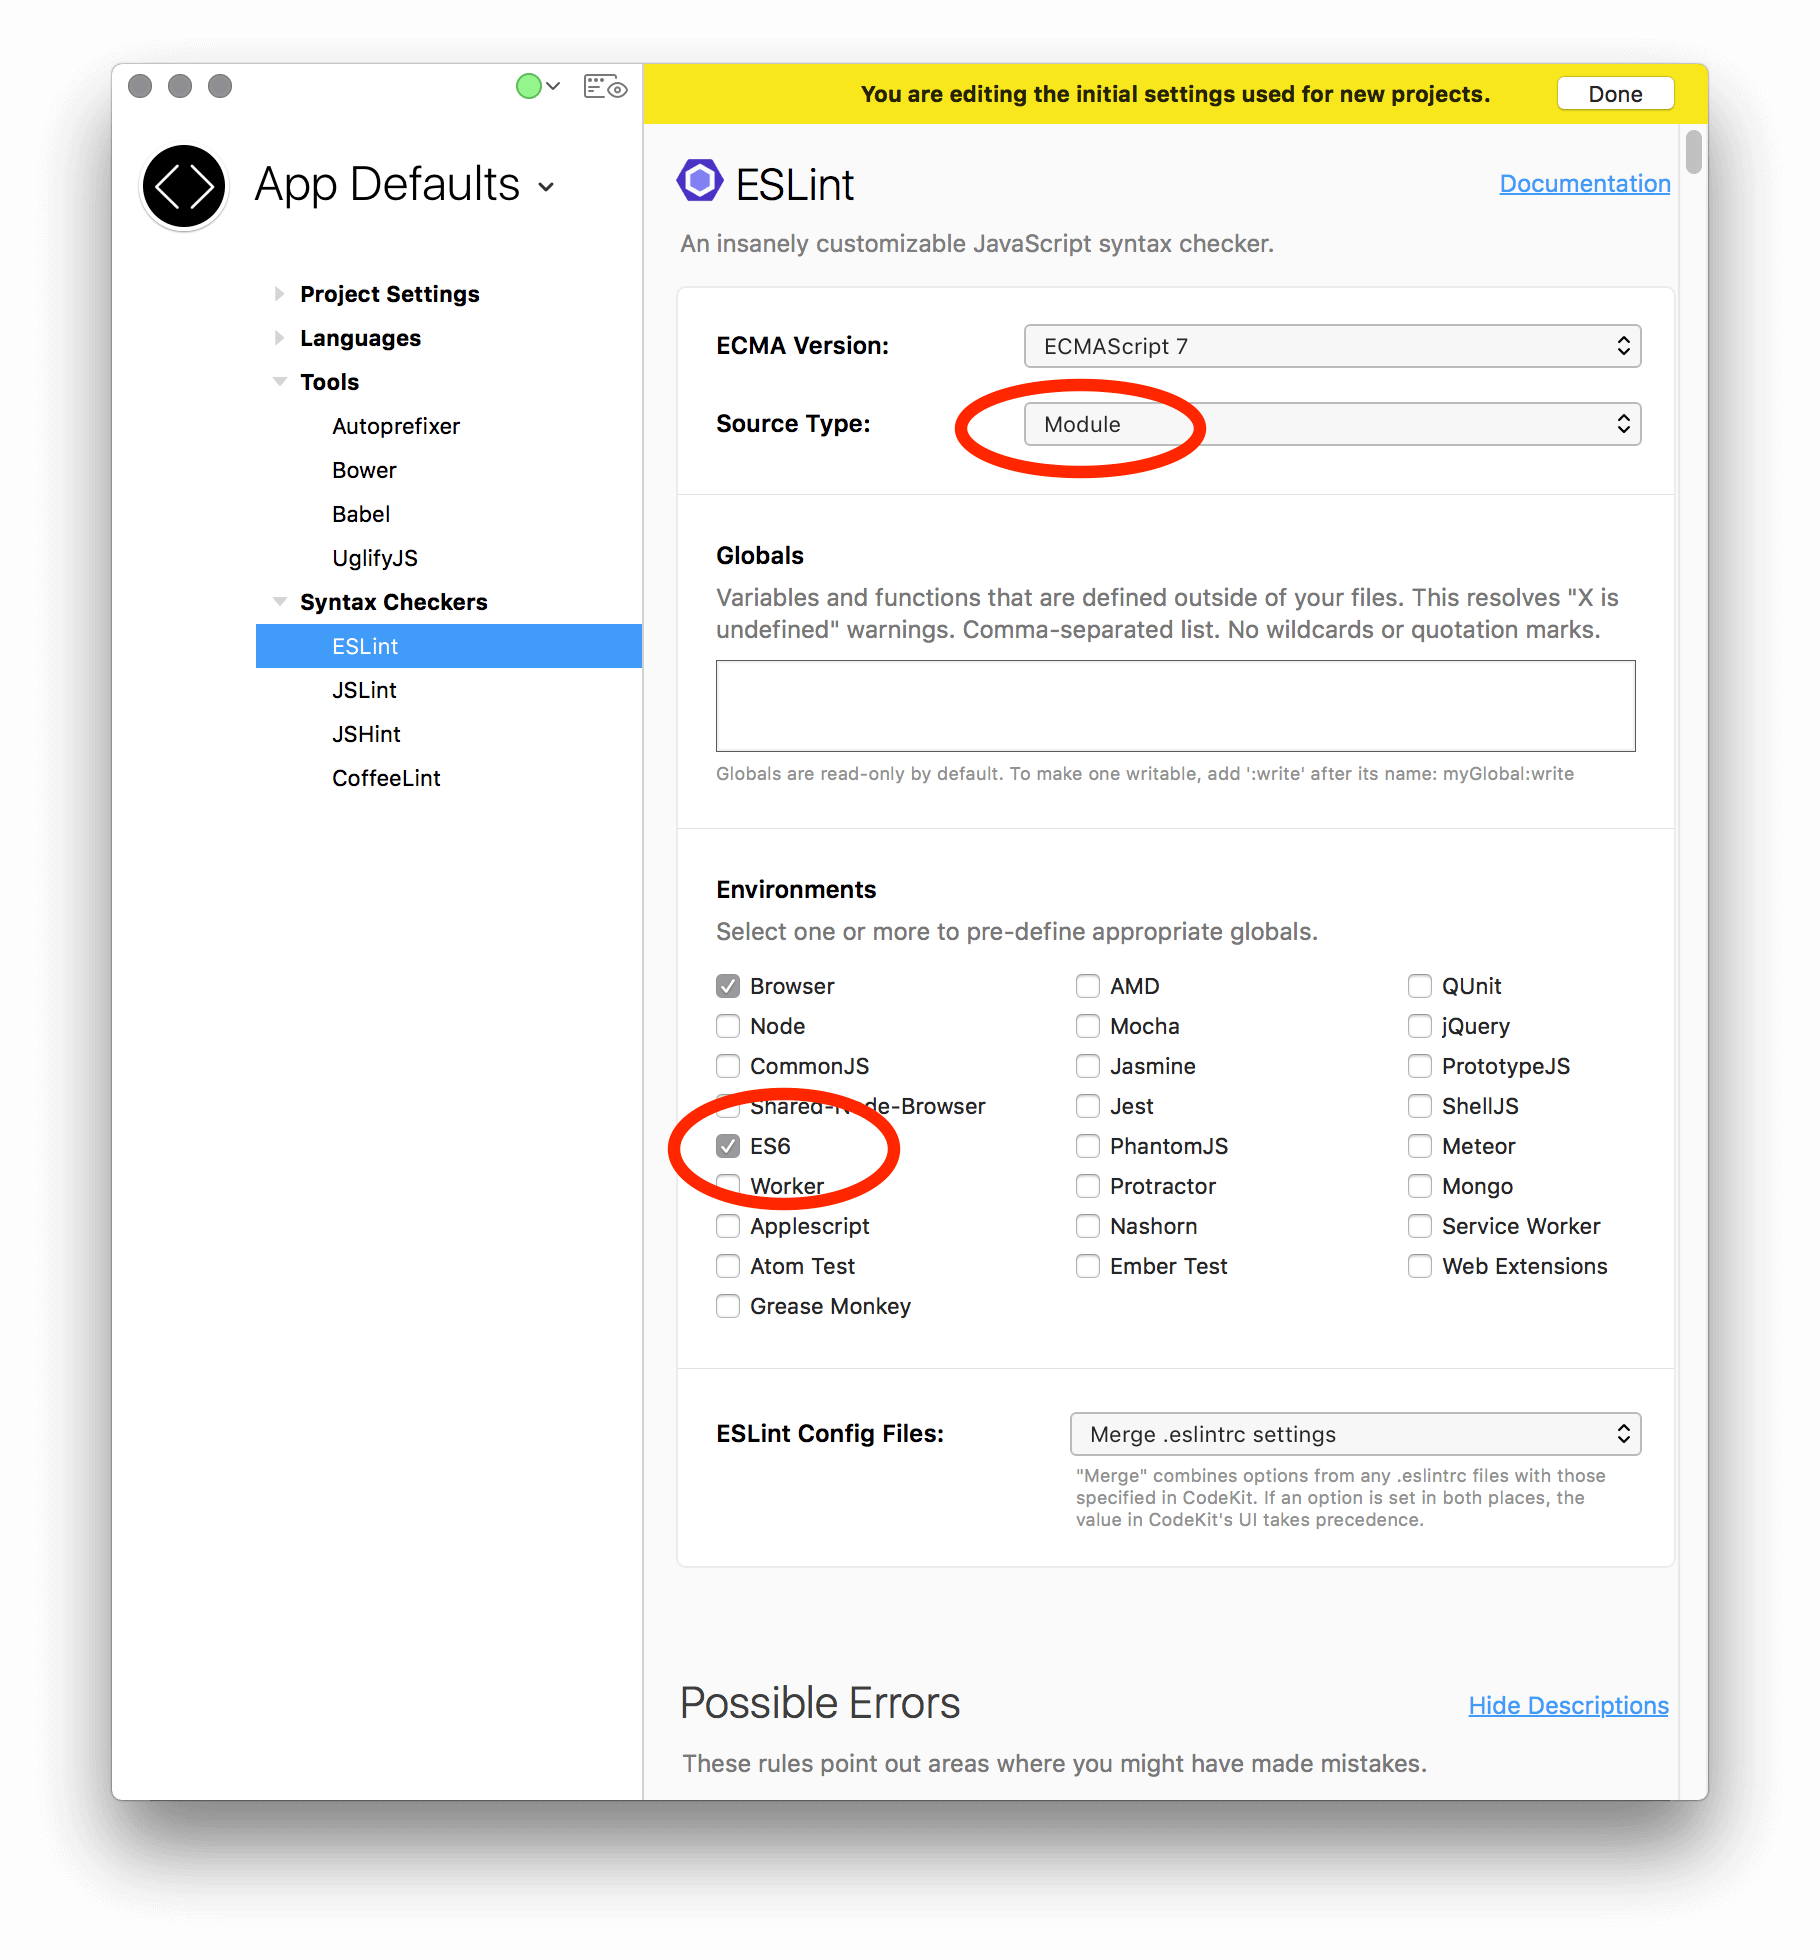
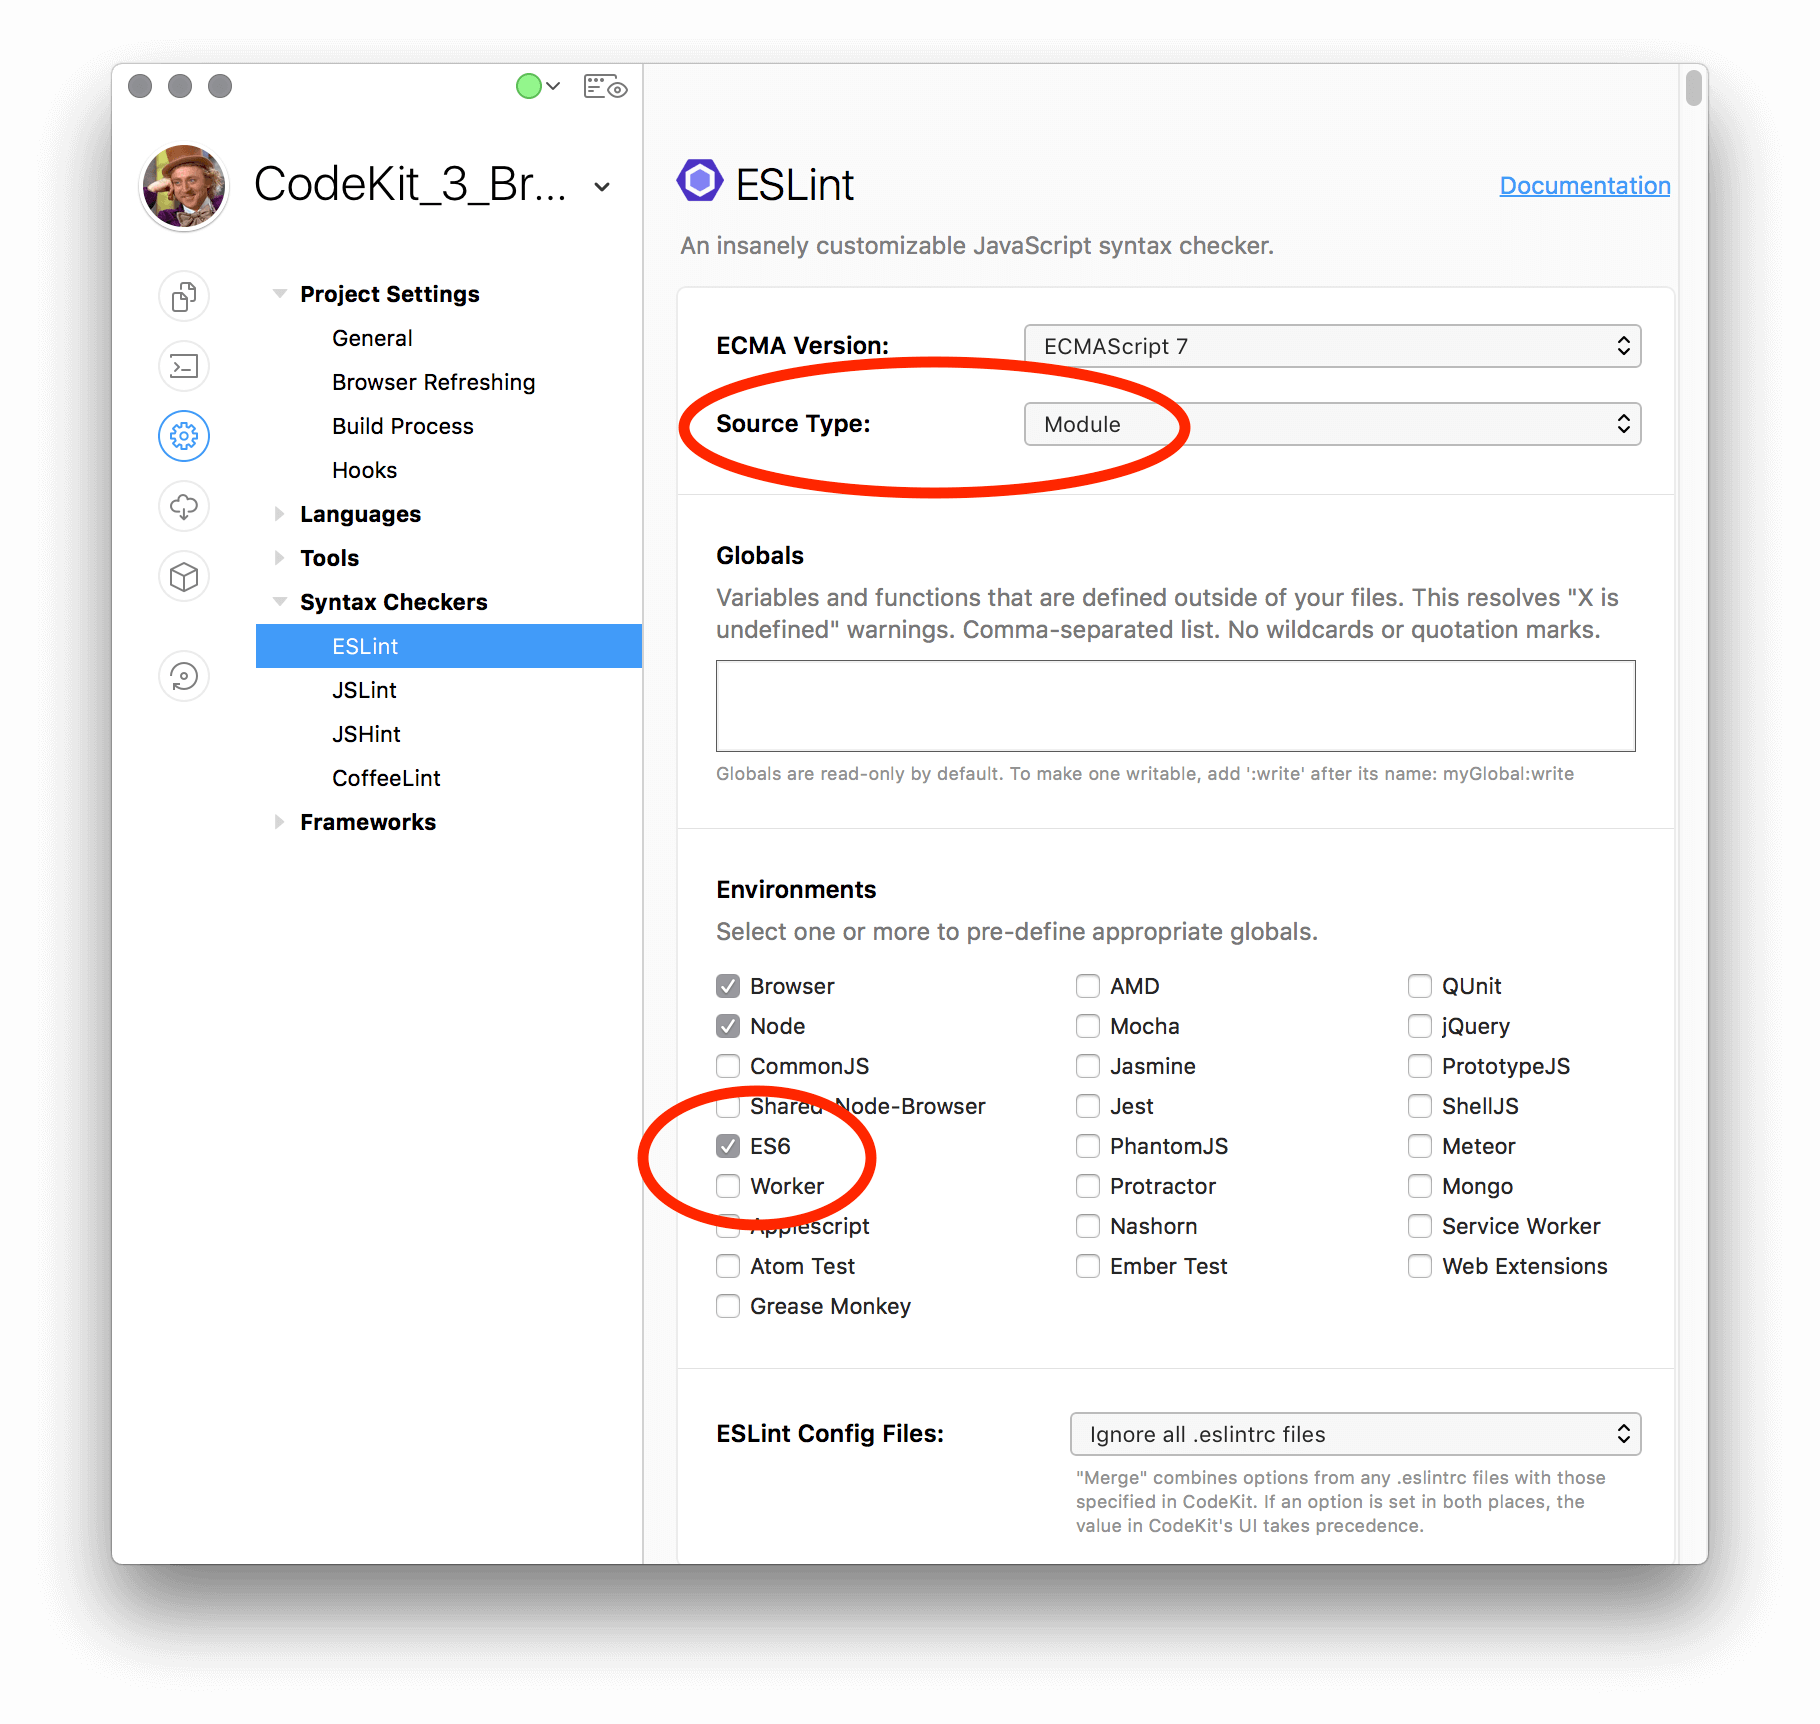
If you’re using ESLint, make sure you’ve set
Source Typeto beModuleand have checked theES6box.
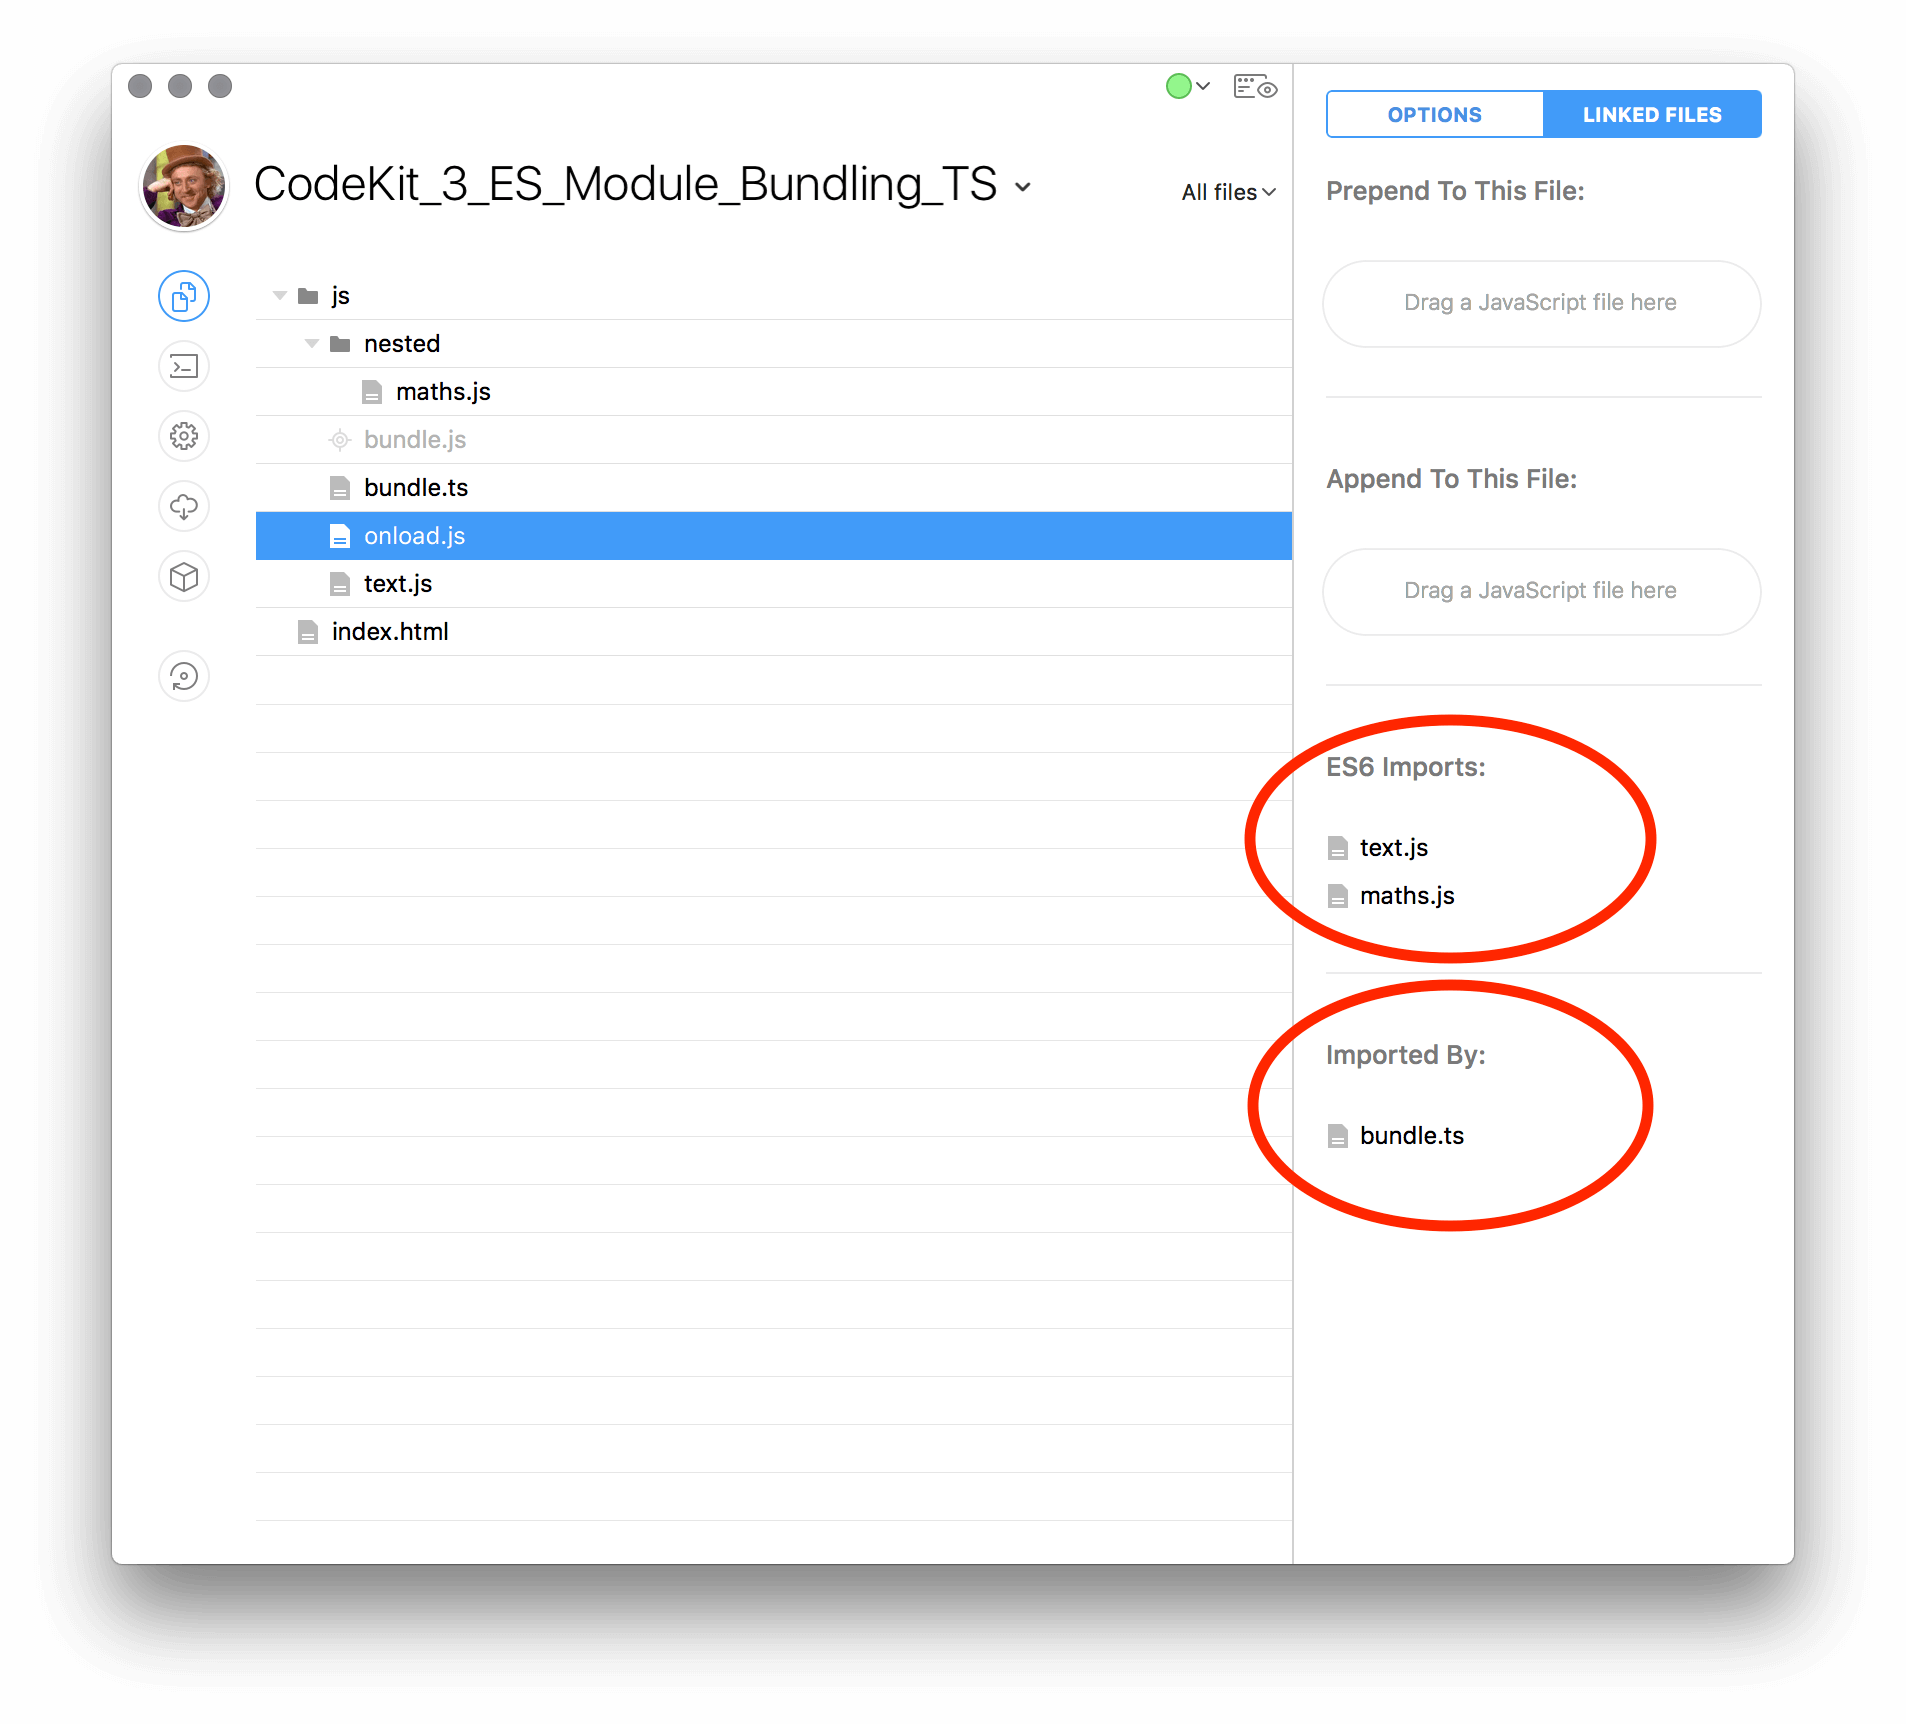
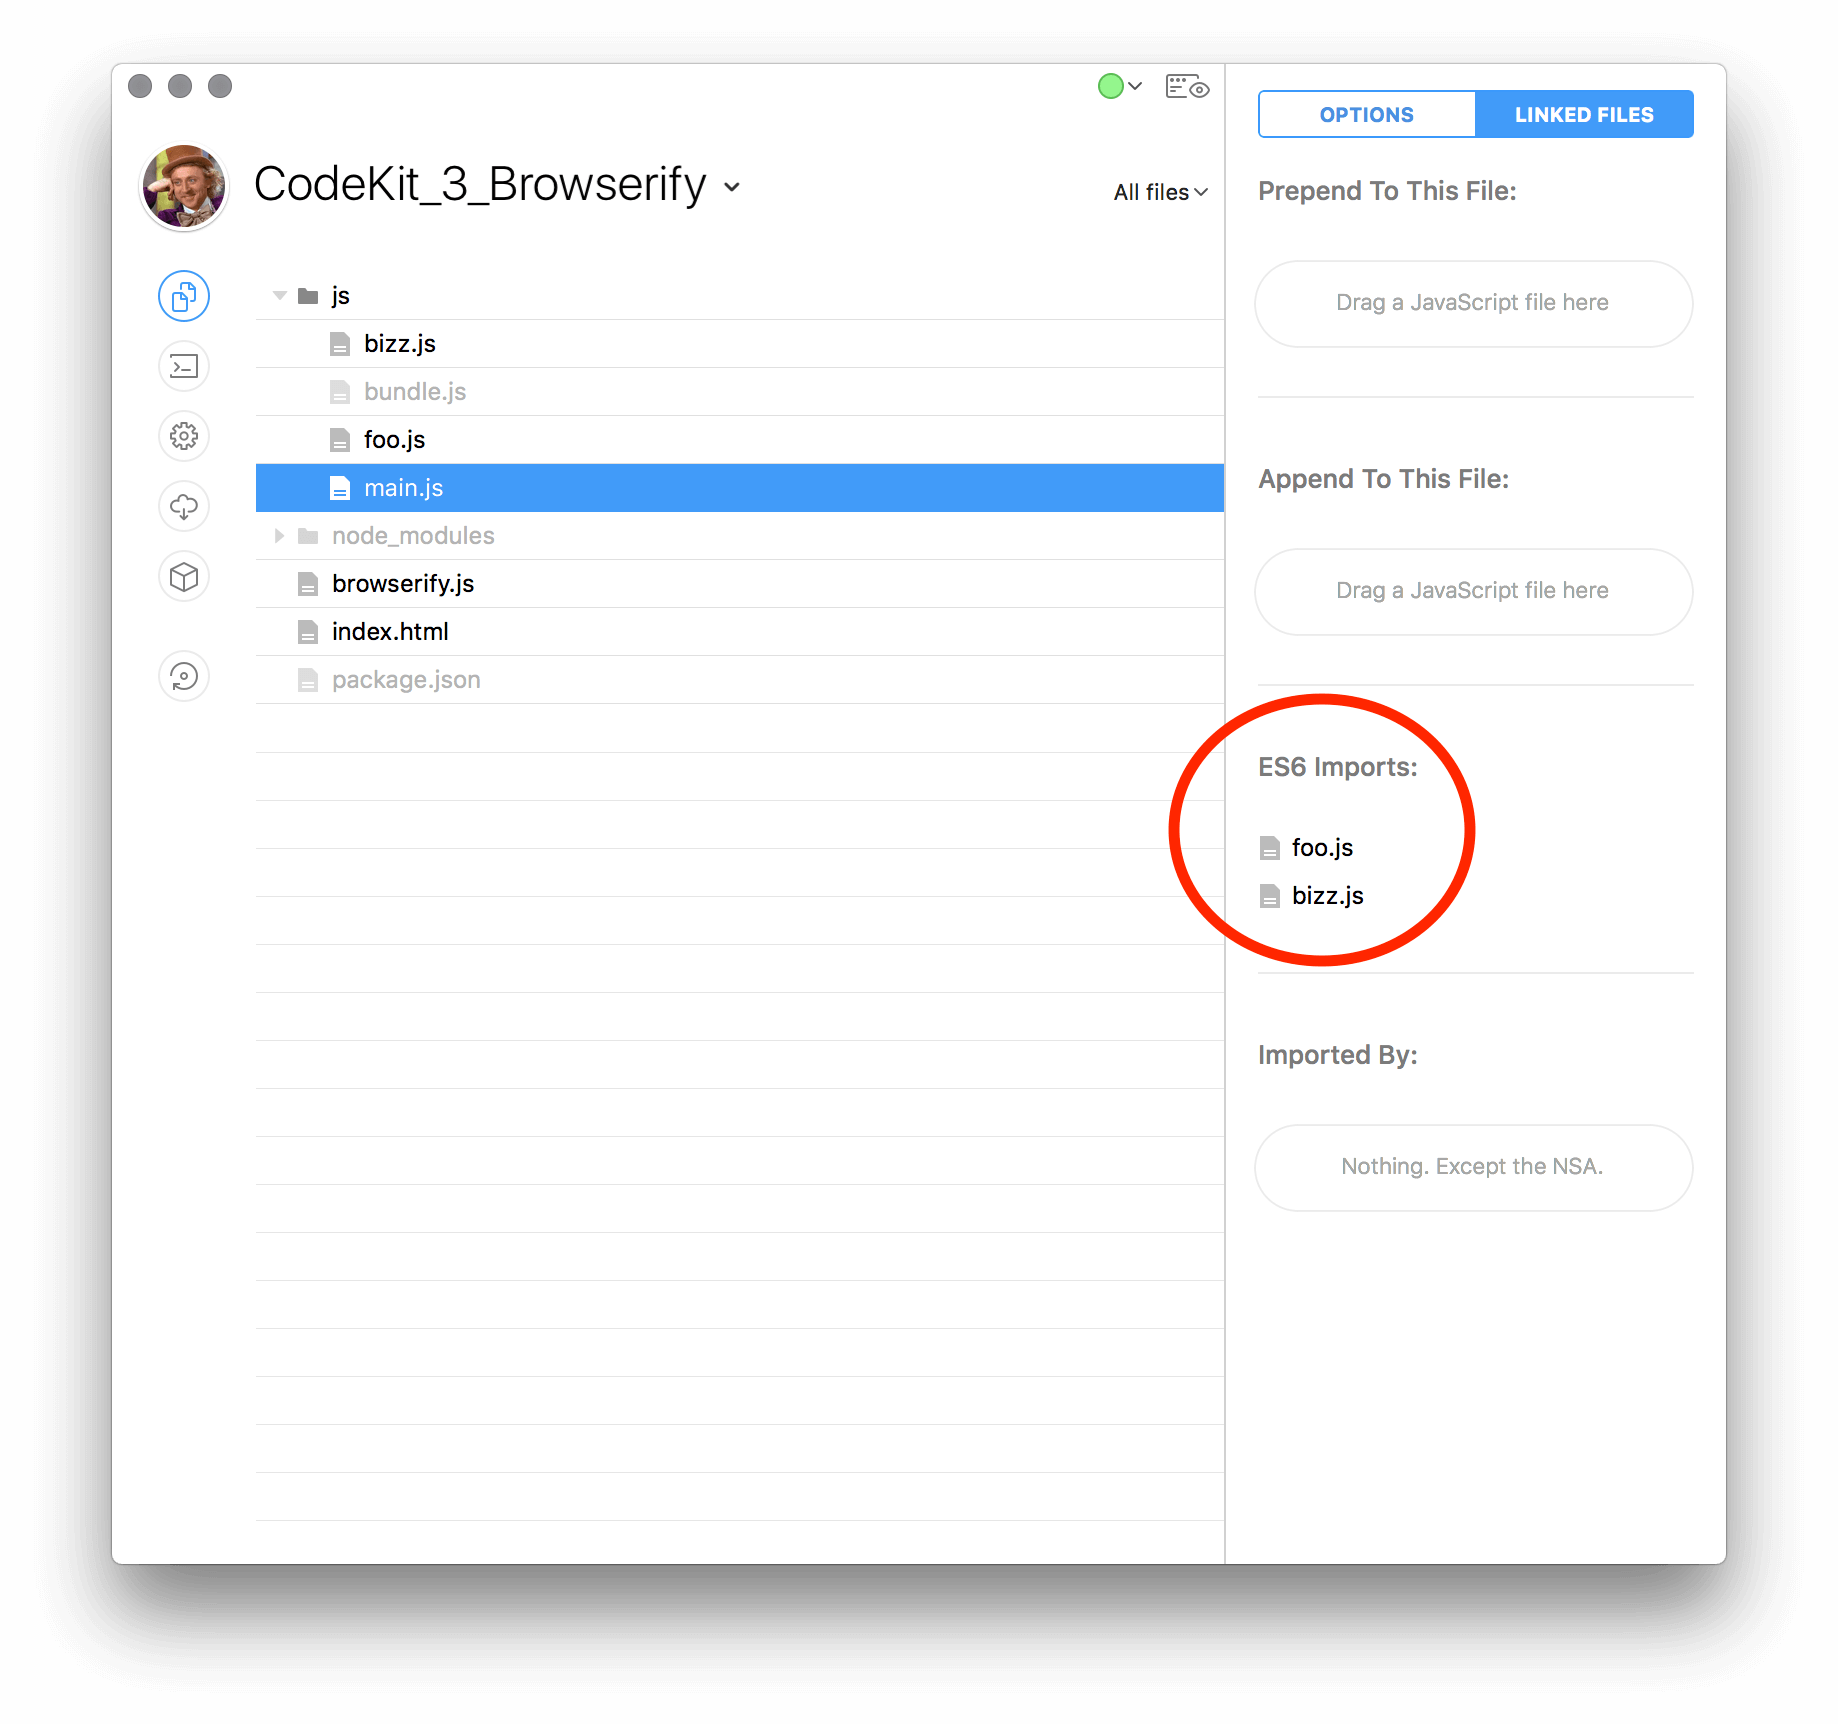
In the following image you’ll see that CodeKit is listing our custom ES Module files that main.js is importing but, you wont see the items that are required from node_modules here due to that folder being skipped by default. Which is a nice perk since you’ll really only want to mess with files that you’re writing yourself and leave the third-party dependencies alone.
Earlier I wrote about either piping Browserify’s content to uglifyjs yourself, or, letting CodeKit handle the minification. Here you can see that it’s as simple as checking a box, one thing to note though, source maps will not work due to us working outside of CodeKit’s baked in transpiling. If source maps are important to you, this will probably the moment you want to uglify the content yourself as well and setup Browserify to build out the source maps too.

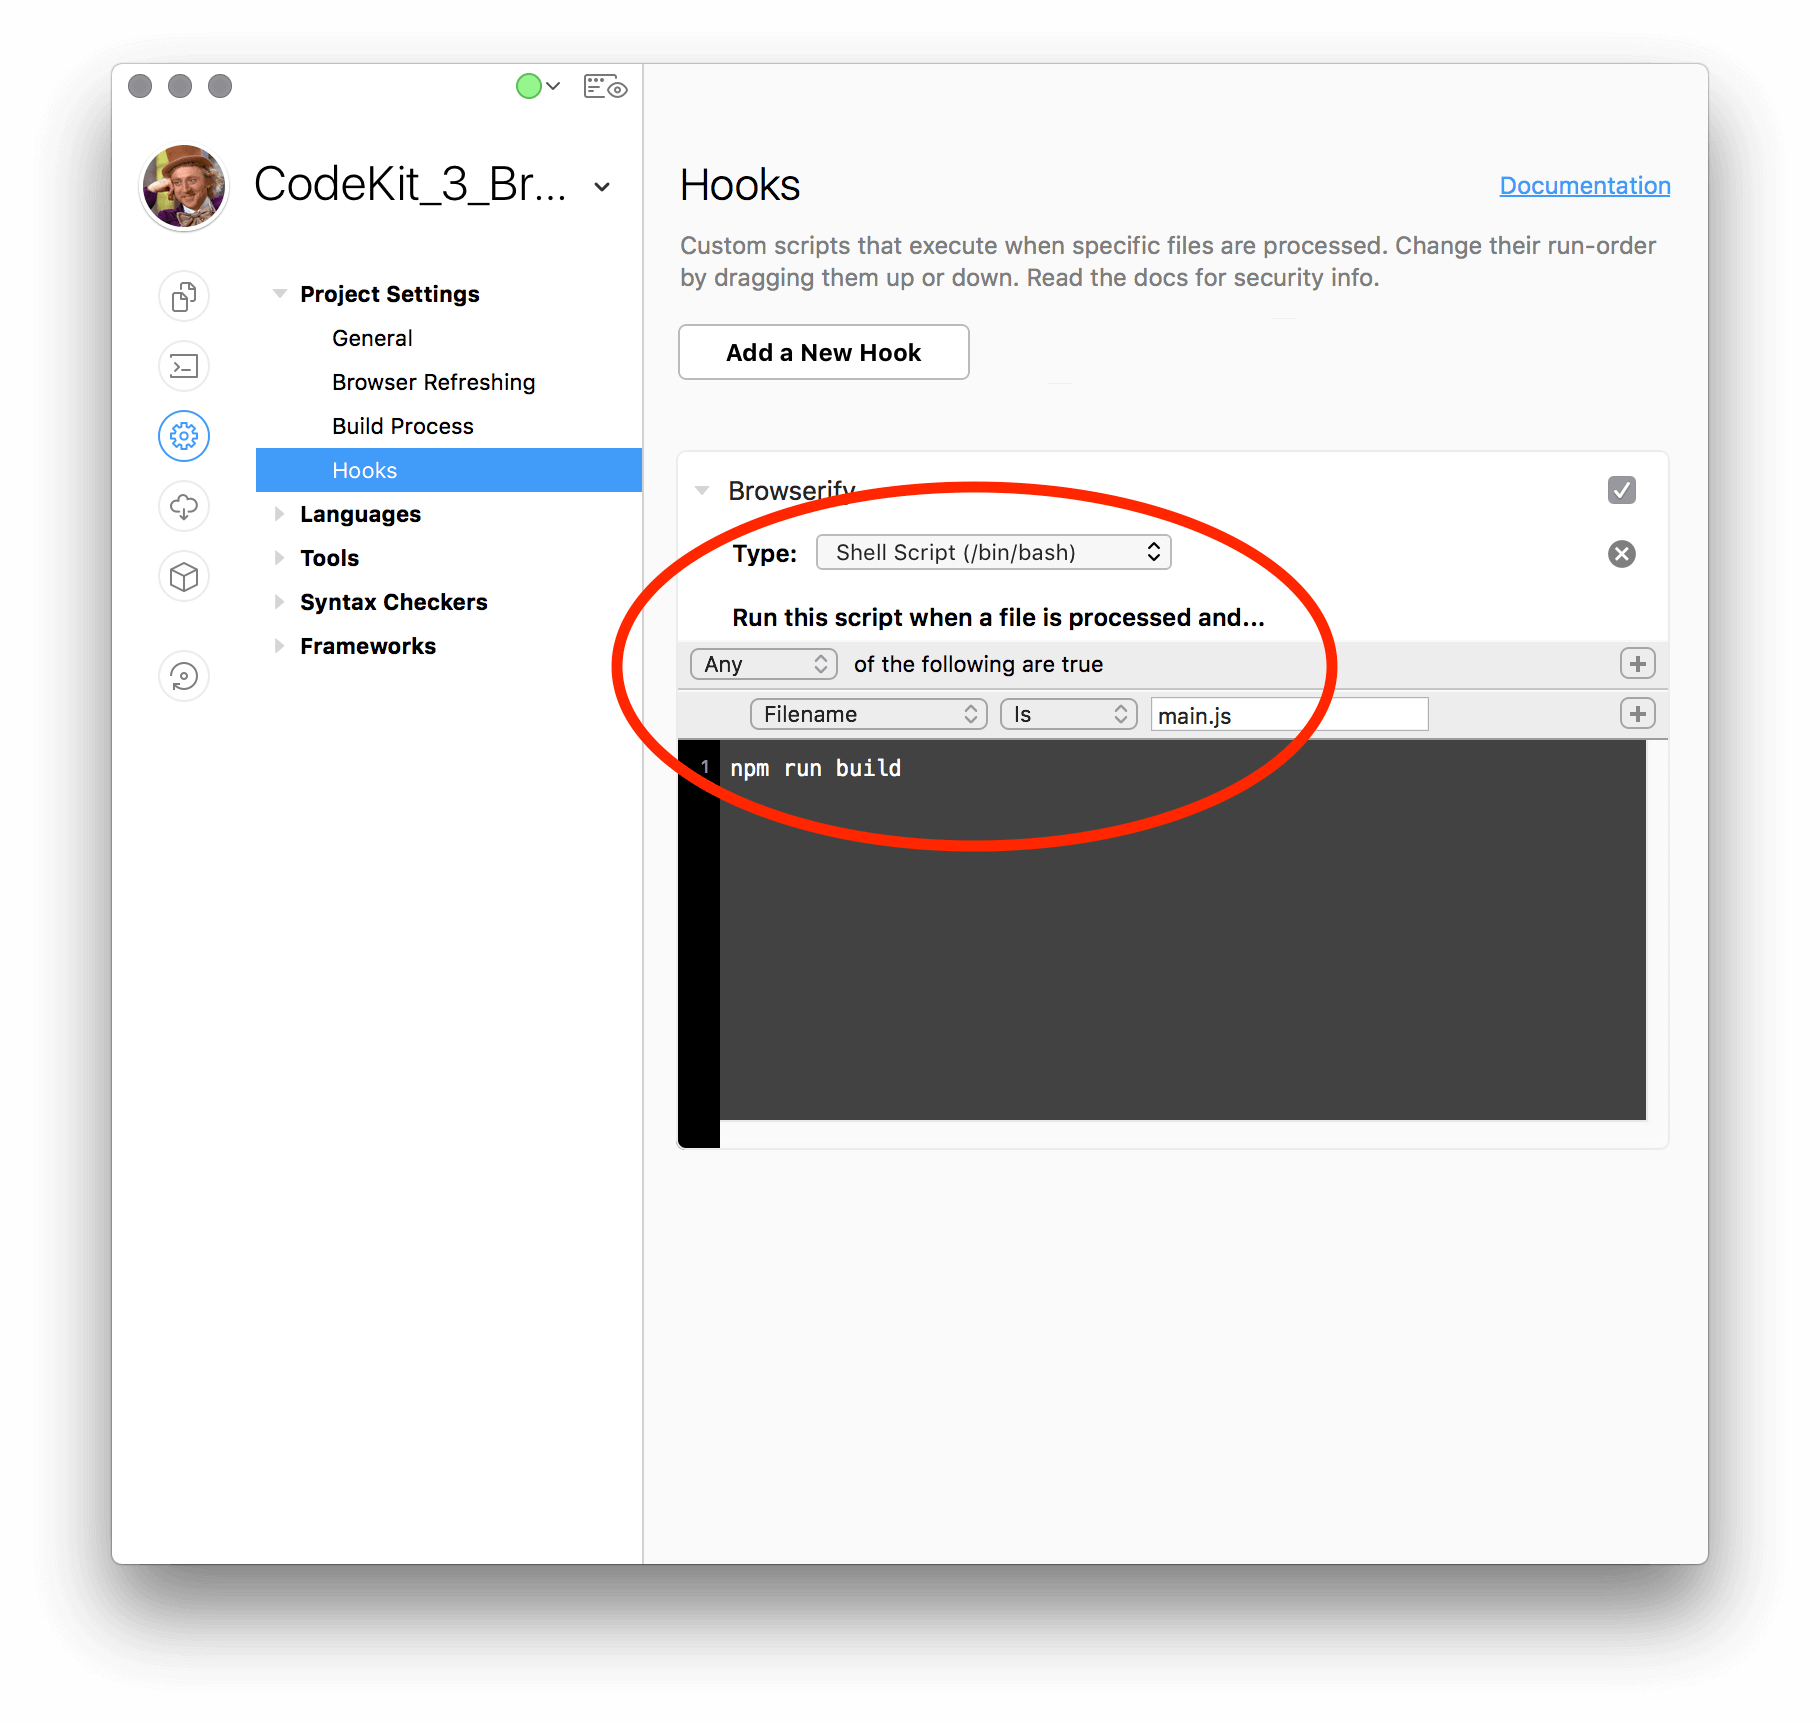
Now, the step that ties everything together and builds out your bundle anytime a dependencies of your entry file changes; The Hook. As you can see below it’s quite simple, just three words. This is because we’re using npm to handle the rest of the logic, so if you want to make modifications to your bundle processes remember that package.json is where all the work is happening.
If you find yourself in a situation where npm is not working out for you and your team, maybe due to some folks not having npm and/or node; Or maybe you’re experimenting with different versions of node and npm. If that’s the case you can setup a Hook that uses CodeKits bundled version of node and a custom JS file written on your end to setup Browserify.
::Warning:: Using this method relies on that fact that everyone has CodeKit installed in the same location and that CodeKit itself doesn’t change the location of node, which is possible as this is not documented. So… enter at your own risk.
Your Hook would look something like:
1 | |
and browserify.js would look something like:
1 | |
Github repo
You can find the sample project with all the above files at https://github.com/subhaze/CodeKit_3_Browserify
When you preview the project you should see the following in your console.
1 | |
Happy coding!
]]>